
Simple Slow Cooker Beef Stroganoff Recipe
### Crock Pot Beef Stroganoff: A Cozy, Hands-Off Dinner
Crock Pot Beef Stroganoff is a beloved dish that features tender chunks of beef and mushrooms enveloped in a rich, creamy stroganoff sauce. This meal is perfect for those who appreciate the convenience of slow cooking, allowing the flavors to meld beautifully throughout the day, resulting in a cozy dinner that requires minimal effort.
#### The Importance of Browning the Beef
One of the key steps in achieving a deep, savory flavor in your stroganoff is browning the beef before adding it to the slow cooker. This process not only enhances the taste but also adds a layer of complexity to the sauce that you might not expect from a slow cooker dish.
#### Why This Recipe is a Family Favorite
This tried-and-true recipe has delighted countless families, and for good reason. Here are a few highlights:
– **Effortless Cooking**: The slow cooker does most of the work, making this recipe incredibly easy to prepare. The beef becomes extra tender as it cooks.
– **Rich Flavor**: The sauce captures all the traditional flavors of a classic stroganoff, enhanced by the slow cooking process in a rich broth.
– **Prep Ahead**: You can prepare the beef the night before, making it easy to pop everything into the crockpot in the morning.
### Ingredients for Crock Pot Stroganoff
To make this delicious dish, you will need the following ingredients:
– **Beef**: Chuck roast is ideal for slow cooking due to its flavor and tenderness. Cut it into bite-sized cubes or use stewing meat.
– **Mushrooms**: White or cremini mushrooms work well. If you’re short on time, canned sliced mushrooms can be a quick substitute.
– **Broth**: A rich beef broth is essential for flavor. If using low sodium broth, consider adding a bouillon cube for added depth.
– **Sour Cream**: Add sour cream just before serving to prevent separation or curdling. Greek yogurt can be used as a substitute.
### Variations
You can easily customize this recipe to suit your tastes:
– **Meat**: Substitute the beef with 1 ½ pounds of lean ground beef. Brown it, drain the fat, and add it to the slow cooker.
– **Seasonings**: While the recipe keeps seasonings simple, feel free to add herbs like thyme for extra flavor.
### How to Make Beef Stroganoff in a Crock Pot
Follow these steps to create your Crock Pot Beef Stroganoff:
1. **Brown the Beef**: Heat olive oil in a skillet, season the beef with salt and pepper, and brown it in small batches. Deglaze the pan with red wine or broth, scraping up the browned bits, and add this to the slow cooker.
2. **Slow Cook**: In the slow cooker, combine the browned beef with garlic powder, onions, Dijon mustard, Worcestershire sauce, mushrooms, and 1 ½ cups of broth. Cook until the beef is tender.
3. **Finish the Sauce**: Once the beef is tender, mix the remaining broth with cornstarch and stir it into the slow cooker. Cover and cook for an additional 15 minutes until thickened. Stir in the sour cream before serving.
**Cooking Times**:
– **Cook on Low**: 7 to 8 hours
– **Cook on High**: 4 to 5 hours
### Serving Suggestions
Crock Pot Beef Stroganoff is typically served over egg noodles, but it also pairs wonderfully with mashed potatoes or any type of pasta. To make the meal more substantial, consider adding a tossed salad and a side of garlic bread.
### Nutritional Information
– **Servings**: 8
– **Calories**: 568
– **Carbohydrates**: 38g
– **Protein**: 29g
– **Fat**: 32g
– **Saturated Fat**: 13g
– **Cholesterol**: 131mg
– **Sodium**: 263mg
– **Potassium**: 766mg
– **Fiber**: 2g
– **Sugar**: 3g
This recipe not only delivers comfort and flavor but also allows for flexibility and ease in preparation, making it a perfect choice for busy weeknights or family gatherings. Enjoy your cozy dinner!

50 Recipes and Meal Plan for the Daniel Fast
Alex & Sonja: Culinary Innovators and Cookbook Writers
Meet Alex and Sonja Overhiser, the energetic pair behind the beloved culinary site, A Couple Cooks. As creators of two acclaimed cookbooks and busy parents, Alex and Sonja have perfected the art of harmonizing family life with their love for cooking. Their adventure started in 2010 when they introduced A Couple Cooks, a platform focused on sharing straightforward, seasonal recipes and the pure joy of culinary artistry.
Throughout the years, Alex and Sonja have amassed an extensive compilation of thousands of unique recipes, each designed with attention and creativity. Their selections range from quick weekday dinners to intricate dishes ideal for festive occasions. What differentiates their recipes is the focus on seasonality and ease, facilitating home cooks in preparing delightful meals with fresh ingredients.
Alongside recipes, A Couple Cooks offers an abundance of cooking suggestions and meal planning inspirations, all meticulously crafted and beautifully captured by Alex and Sonja themselves. Their content is not only aesthetically pleasing but also functional, as each recipe is rigorously tested in their own kitchen and validated by their children.
Alex and Sonja’s cookbooks further highlight their culinary knowledge, presenting readers with a curated collection of their finest recipes accompanied by insights into their cooking philosophy. As a genuine couple that cooks together, they contribute a distinctive viewpoint to the realm of food blogging, encouraging others to discover pleasure in the kitchen and the shared journey of cooking with loved ones.
Whether you are an experienced chef or a beginner cook, Alex and Sonja’s friendly approach and enthusiasm for food make A Couple Cooks an essential resource for anyone aiming to elevate their culinary abilities and appreciate the art of cooking. Their narrative exemplifies the ability of food to unite people and the endless opportunities that emerge when creativity intertwines with the kitchen.

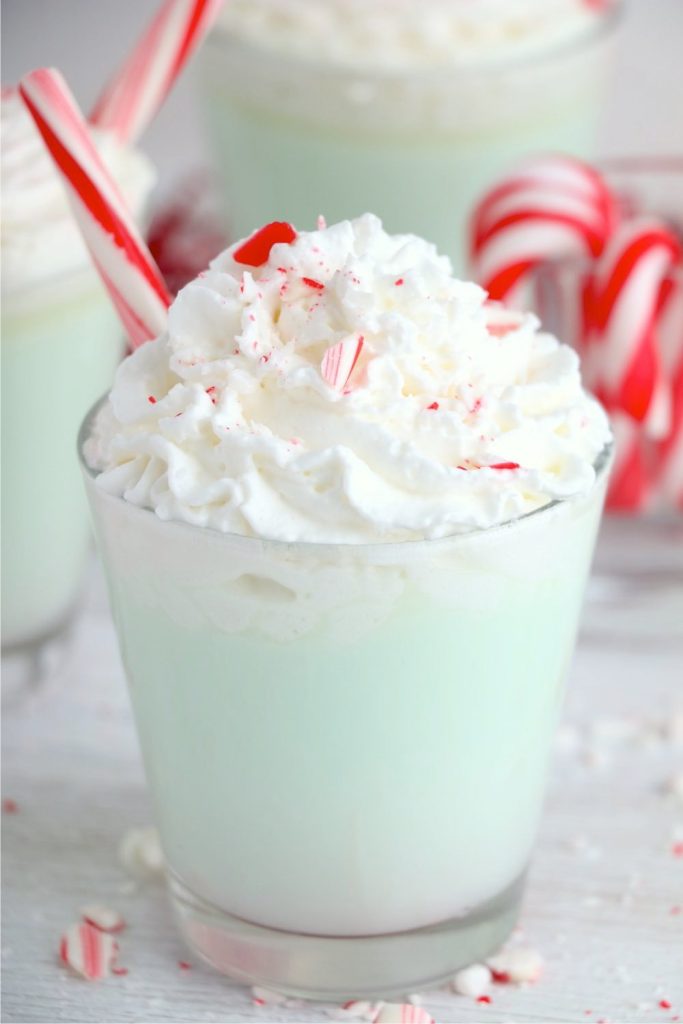
White Russian with Peppermint Essence
This luscious Peppermint White Russian showcases vodka, Kahlua, and peppermint schnapps for a minty variation of the traditional cocktail! It’s merry and ideal for winter gatherings.
If you’re in search of a cheerful winter cocktail that’s sweet and creamy, I would recommend the Peppermint White Russian. I don’t typically indulge in sweet cocktails, but this rendition of the classic White Russian has captivated me.
Through multiple rounds of recipe experimentation, I discovered that this minty twist might actually outperform the original. The peppermint doesn’t merely enhance flavor: it transforms the drink into a taste reminiscent of liquid peppermint bark with a caffeine jolt! (What’s not to appreciate?)
Ingredients in a Peppermint White Russian
The White Russian is an iconic cocktail that dates back to the 1950s, consisting of vodka, heavy cream, and coffee liqueur. It is a variation of another classic cocktail, the Black Russian, which simply combines vodka and Kahlua. You may recognize the White Russian from the 1998 film The Big Lebowski, though it has a much richer history.
For the Peppermint White Russian version, you simply incorporate peppermint schnapps to give each sip a minty finish. It softens the flavors into an even more intriguing balance. Here’s what you will require:
– Vodka: The primary spirit that allows the other flavors to shine
– Coffee liqueur: I usually opt for Kahlua, though Tia Maria is also a good choice
– Peppermint schnapps: This is where the enchantment occurs (more on selecting the right proof below)
– Heavy cream or milk: Provides that signature creamy consistency
Understanding Peppermint Schnapps Proof
Here’s a lesson I learned the hard way: you’ll find three distinct proof levels in most stores:
– 30 proof (15% ABV) – Milder and sweeter
– 60 proof (30% ABV) – Standard strength
– 100 proof (50% ABV) – Quite potent
If your bottle indicates 100 proof, use half the amount specified in the recipe and sample as you go. I made the error of using the full amount with 100 proof schnapps once, and the drink was overwhelmingly strong! The 60 proof variety is my preferred choice.
How to make a Peppermint White Russian
Creating the Peppermint White Russian is incredibly simple! You can assemble it directly in the glass: there’s no need to pull out a cocktail shaker or mixing glass. Here’s the process:
1. Pour the vodka, Kahlua, and peppermint schnapps into a lowball glass. Then, add the cream.
2. Gently stir to achieve the swirl effect. Stirring the drink immediately will turn it off-white. It’s more enjoyable to create the swirl effect! Stir gently just a few times, and the cream will swirl into a lovely pattern.
Tip: To elevate the drink, consider using clear ice that is crystal clear instead of cloudy standard ice. It gives the drink an upscale bar appearance!
How Sweet is This Drink?
The White Russian is infamously sweet, thanks to the Kahlua. This coffee liqueur adds a significant amount of sugar to the drink! Tia Maria offers a more refined version of the coffee liqueur, creating a slightly more balanced drink. You might think about this for a more elegant take here.
The peppermint schnapps also contributes sweetness; interestingly, the minty flavor helps balance the sweetness. In our view, the Peppermint White Russian tastes more harmoniously balanced than the classic, yet it remains quite a sweet beverage.
Cream Alternatives
This is a rather rich drink, so similar to my classic White Russian, I prefer using some alternatives to heavy cream. Here are a few I’ve experimented with:
– Half and Half: This is my preferred lighter substitute: it still creates swirls and has enough richness to feel satisfying.
– Whole Milk: This works but results in a slightly more diluted drink. You can make 2% work, although I would steer clear of 1% or skim.
– Full fat coconut milk (or oat milk): For a dairy-free White Russian, I enjoy coconut milk (canned, full fat) as it still creates the swirls. Oat milk can also be used, but it tends to be thinner.
Ways to Serve This Festive Cocktail
This Peppermint White Russian is perfect for serving as a holiday drink. Here are a few ways I like to present it:
Peppermint White Russian
This luscious Peppermint White Russian showcases vodka, Kahlua, and peppermint schnapps for a minty variation of the traditional cocktail! It’s merry and ideal for winter gatherings.
Author: Sonja Overhiser
Prep Time: 2 minutes
Cook Time: 0 minutes
Total Time: 2 minutes
Yield:
Mint Chocolate Cream Drink
This Grasshopper beverage recipe transforms mint and chocolate liqueurs into a rich dessert cocktail that is sure to impress everyone! Here are my professional tips for crafting this minty green after-dinner drink.
As a lifelong fan of mint chocolate chip ice cream, it’s no wonder I’m attracted to the Grasshopper drink! This light green classic cocktail originated in 1918, yet it remains a favorite today.
The blend of crème de menthe and crème de cacao creates this remarkably smooth, creamy beverage that resembles dessert more than a cocktail: which is precisely the aim! It stands out as one of my preferred sweet alcoholic beverages and is quite easy to prepare at home.
What Makes a Grasshopper Unique?
The Grasshopper cocktail is a post-meal drink featuring two liqueurs: crème de menthe and crème de cacao. Allegedly, it was created in New Orleans in 1918 by the proprietor of Tujague’s bar.
According to Tujague’s legend, Philip Guichet designed it for a cocktail contest in New York City, where it placed second. He later introduced it to his bar, and Tujague’s has continued to serve it ever since.
Key Ingredients
The Grasshopper gained such popularity that it was included in the International Bartender Association’s IBA official cocktails, which means it has an “official” classification. There’s also a variation of the Grasshopper that includes ice cream, resembling more of a milkshake. The classic Grasshopper cocktail consists of:
– Crème de menthe: The Grasshopper is the primary reason to purchase this liqueur, although you may occasionally use it in other cocktails like the Stinger Cocktail. It’s a vibrant green liqueur developed in the 1880s and contains no actual cream: it’s alcohol infused with peppermint. The flavor is intensely minty, akin to peppermint schnapps but more polished and balanced. You want the green version for a Grasshopper.
– Crème de cacao: This chocolate liqueur is slightly more adaptable: it boasts a smooth milk chocolate taste with hints of vanilla. Besides Grasshoppers, you can incorporate crème de cacao into Chocolate Martinis, Brandy Alexanders, and Mudslides.
– Heavy cream: Cream provides the silky texture of this cocktail. Similar to a White Russian, you can substitute half and half, whole milk, or even full-fat coconut milk or oat milk for a non-dairy alternative.
The Frozen Grasshopper Variation
If the term Grasshopper conjures images of a boozy milkshake, then you’re thinking of its variant known as the Frozen Grasshopper. The Frozen Grasshopper originated in Wisconsin and was frequently served at supper clubs there.
The Wisconsin drinking style is also responsible for classics like the Brandy Old Fashioned, Pink Squirrel, and Brandy Alexander: it’s all about enjoyable, sweet cocktails heavy on dairy!
To create a frozen version, use 2 scoops of vanilla ice cream in place of cream and blend until smooth. It tastes like a mint chocolate milkshake with a spirited twist!
Serving Recommendations and Presentation Tips
Present your Grasshopper in a chilled martini glass or coupe, adorned with shaved dark chocolate or a light sprinkle of cocoa powder. You can also rim the glass with chocolate syrup or create a swirl inside (similar to this Chocolate Martini).
This beverage is perfect as a dessert drink after a meal. It complements chocolate desserts such as flourless chocolate cake, brownies, or chocolate-covered strawberries beautifully. It’s also a festive green drink for St. Patrick’s Day thanks to its vivid hue (though there’s nothing Irish about it).
For a playful twist during the festive season, consider serving mini Grasshoppers (a half recipe) in cordial or host glasses as a dessert cocktail flight, alongside Spiked Hot Chocolate or Irish Coffee.
Storage and Pre-Making Tips
A Grasshopper cocktail tastes best when served immediately after shaking. The cream can separate if left too long, and the frozen version melts quickly.
To prepare this drink in batch, you can mix 2 to 3 cocktails at once (approximately 12-16 ounces of liquid) in a 28-ounce cocktail shaker. Ensure you don’t fill it more than two-thirds full.
The liqueurs themselves are stable on the shelf and will last for 2 to 3 years in your liquor cabinet. Keep them in a cool, dark environment shielded from direct sunlight.
Common Questions
Can I substitute white crème de menthe for green? It would have the same taste but would lose the stunning green color! The flavor will be identical, but you’d forfeit that iconic emerald look (you could add a drop of food coloring if desired).
What distinguishes a Grasshopper from a Mint Chocolate Martini? A classic Grasshopper incorporates cream and equal amounts of the two liqueurs, resulting in a decadent, dessert-like drink. Mint chocolate

Single-Pan Baked Pizza in the Oven
Store-bought: You can also prepare this recipe using 1 ½ pounds of pizza dough purchased from the store. Allow the dough to reach room temperature before shaping. Shorten the second resting period to roughly 15 minutes since commercial dough is generally already proofed.
Make-ahead: You can make the pizza dough and finish the initial proof only, then cover the entire sheet with plastic wrap and refrigerate for 24 hours (the second proof will take place in the refrigerator). Ensure to let it sit at room temperature for 30 minutes prior to baking.
Storage: Remaining sheet pan pizza can be kept in the refrigerator for up to 4 days.
Reheating: Warm slices in a covered skillet over medium heat for approximately 5 minutes. This technique crisps the bottom while heating the toppings. You may also reheat in an air fryer for a few minutes or in a 375°F oven for 8-10 minutes.

Simple Slow Cooker Beef Stroganoff Recipe
### Crock Pot Beef Stroganoff: A Cozy, Hands-Off Dinner
Crock Pot Beef Stroganoff is a beloved dish that features tender chunks of beef and mushrooms enveloped in a rich, creamy stroganoff sauce. This meal is perfect for those who appreciate the convenience of slow cooking, allowing the flavors to meld beautifully throughout the day, resulting in a cozy dinner that requires minimal effort.
#### The Importance of Browning the Beef
One of the key steps in achieving a deep, savory flavor in your stroganoff is browning the beef before adding it to the slow cooker. This process not only enhances the taste but also adds a layer of complexity to the sauce that you might not expect from a slow cooker dish.
#### Why This Recipe is a Family Favorite
This tried-and-true recipe has delighted countless families, and for good reason. Here are a few highlights:
– **Effortless Cooking**: The slow cooker does most of the work, making this recipe incredibly easy to prepare. The beef becomes extra tender as it cooks.
– **Rich Flavor**: The sauce captures all the traditional flavors of a classic stroganoff, enhanced by the slow cooking process in a rich broth.
– **Prep Ahead**: You can prepare the beef the night before, making it easy to pop everything into the crockpot in the morning.
### Ingredients for Crock Pot Stroganoff
To make this delicious dish, you will need the following ingredients:
– **Beef**: Chuck roast is ideal for slow cooking due to its flavor and tenderness. Cut it into bite-sized cubes or use stewing meat.
– **Mushrooms**: White or cremini mushrooms work well. If you’re short on time, canned sliced mushrooms can be a quick substitute.
– **Broth**: A rich beef broth is essential for flavor. If using low sodium broth, consider adding a bouillon cube for added depth.
– **Sour Cream**: Add sour cream just before serving to prevent separation or curdling. Greek yogurt can be used as a substitute.
### Variations
You can easily customize this recipe to suit your tastes:
– **Meat**: Substitute the beef with 1 ½ pounds of lean ground beef. Brown it, drain the fat, and add it to the slow cooker.
– **Seasonings**: While the recipe keeps seasonings simple, feel free to add herbs like thyme for extra flavor.
### How to Make Beef Stroganoff in a Crock Pot
Follow these steps to create your Crock Pot Beef Stroganoff:
1. **Brown the Beef**: Heat olive oil in a skillet, season the beef with salt and pepper, and brown it in small batches. Deglaze the pan with red wine or broth, scraping up the browned bits, and add this to the slow cooker.
2. **Slow Cook**: In the slow cooker, combine the browned beef with garlic powder, onions, Dijon mustard, Worcestershire sauce, mushrooms, and 1 ½ cups of broth. Cook until the beef is tender.
3. **Finish the Sauce**: Once the beef is tender, mix the remaining broth with cornstarch and stir it into the slow cooker. Cover and cook for an additional 15 minutes until thickened. Stir in the sour cream before serving.
**Cooking Times**:
– **Cook on Low**: 7 to 8 hours
– **Cook on High**: 4 to 5 hours
### Serving Suggestions
Crock Pot Beef Stroganoff is typically served over egg noodles, but it also pairs wonderfully with mashed potatoes or any type of pasta. To make the meal more substantial, consider adding a tossed salad and a side of garlic bread.
### Nutritional Information
– **Servings**: 8
– **Calories**: 568
– **Carbohydrates**: 38g
– **Protein**: 29g
– **Fat**: 32g
– **Saturated Fat**: 13g
– **Cholesterol**: 131mg
– **Sodium**: 263mg
– **Potassium**: 766mg
– **Fiber**: 2g
– **Sugar**: 3g
This recipe not only delivers comfort and flavor but also allows for flexibility and ease in preparation, making it a perfect choice for busy weeknights or family gatherings. Enjoy your cozy dinner!
Read More
50 Recipes and Meal Plan for the Daniel Fast
Alex & Sonja: Culinary Innovators and Cookbook Writers
Meet Alex and Sonja Overhiser, the energetic pair behind the beloved culinary site, A Couple Cooks. As creators of two acclaimed cookbooks and busy parents, Alex and Sonja have perfected the art of harmonizing family life with their love for cooking. Their adventure started in 2010 when they introduced A Couple Cooks, a platform focused on sharing straightforward, seasonal recipes and the pure joy of culinary artistry.
Throughout the years, Alex and Sonja have amassed an extensive compilation of thousands of unique recipes, each designed with attention and creativity. Their selections range from quick weekday dinners to intricate dishes ideal for festive occasions. What differentiates their recipes is the focus on seasonality and ease, facilitating home cooks in preparing delightful meals with fresh ingredients.
Alongside recipes, A Couple Cooks offers an abundance of cooking suggestions and meal planning inspirations, all meticulously crafted and beautifully captured by Alex and Sonja themselves. Their content is not only aesthetically pleasing but also functional, as each recipe is rigorously tested in their own kitchen and validated by their children.
Alex and Sonja’s cookbooks further highlight their culinary knowledge, presenting readers with a curated collection of their finest recipes accompanied by insights into their cooking philosophy. As a genuine couple that cooks together, they contribute a distinctive viewpoint to the realm of food blogging, encouraging others to discover pleasure in the kitchen and the shared journey of cooking with loved ones.
Whether you are an experienced chef or a beginner cook, Alex and Sonja’s friendly approach and enthusiasm for food make A Couple Cooks an essential resource for anyone aiming to elevate their culinary abilities and appreciate the art of cooking. Their narrative exemplifies the ability of food to unite people and the endless opportunities that emerge when creativity intertwines with the kitchen.
Read More
White Russian with Peppermint Essence
This luscious Peppermint White Russian showcases vodka, Kahlua, and peppermint schnapps for a minty variation of the traditional cocktail! It’s merry and ideal for winter gatherings.
If you’re in search of a cheerful winter cocktail that’s sweet and creamy, I would recommend the Peppermint White Russian. I don’t typically indulge in sweet cocktails, but this rendition of the classic White Russian has captivated me.
Through multiple rounds of recipe experimentation, I discovered that this minty twist might actually outperform the original. The peppermint doesn’t merely enhance flavor: it transforms the drink into a taste reminiscent of liquid peppermint bark with a caffeine jolt! (What’s not to appreciate?)
Ingredients in a Peppermint White Russian
The White Russian is an iconic cocktail that dates back to the 1950s, consisting of vodka, heavy cream, and coffee liqueur. It is a variation of another classic cocktail, the Black Russian, which simply combines vodka and Kahlua. You may recognize the White Russian from the 1998 film The Big Lebowski, though it has a much richer history.
For the Peppermint White Russian version, you simply incorporate peppermint schnapps to give each sip a minty finish. It softens the flavors into an even more intriguing balance. Here’s what you will require:
– Vodka: The primary spirit that allows the other flavors to shine
– Coffee liqueur: I usually opt for Kahlua, though Tia Maria is also a good choice
– Peppermint schnapps: This is where the enchantment occurs (more on selecting the right proof below)
– Heavy cream or milk: Provides that signature creamy consistency
Understanding Peppermint Schnapps Proof
Here’s a lesson I learned the hard way: you’ll find three distinct proof levels in most stores:
– 30 proof (15% ABV) – Milder and sweeter
– 60 proof (30% ABV) – Standard strength
– 100 proof (50% ABV) – Quite potent
If your bottle indicates 100 proof, use half the amount specified in the recipe and sample as you go. I made the error of using the full amount with 100 proof schnapps once, and the drink was overwhelmingly strong! The 60 proof variety is my preferred choice.
How to make a Peppermint White Russian
Creating the Peppermint White Russian is incredibly simple! You can assemble it directly in the glass: there’s no need to pull out a cocktail shaker or mixing glass. Here’s the process:
1. Pour the vodka, Kahlua, and peppermint schnapps into a lowball glass. Then, add the cream.
2. Gently stir to achieve the swirl effect. Stirring the drink immediately will turn it off-white. It’s more enjoyable to create the swirl effect! Stir gently just a few times, and the cream will swirl into a lovely pattern.
Tip: To elevate the drink, consider using clear ice that is crystal clear instead of cloudy standard ice. It gives the drink an upscale bar appearance!
How Sweet is This Drink?
The White Russian is infamously sweet, thanks to the Kahlua. This coffee liqueur adds a significant amount of sugar to the drink! Tia Maria offers a more refined version of the coffee liqueur, creating a slightly more balanced drink. You might think about this for a more elegant take here.
The peppermint schnapps also contributes sweetness; interestingly, the minty flavor helps balance the sweetness. In our view, the Peppermint White Russian tastes more harmoniously balanced than the classic, yet it remains quite a sweet beverage.
Cream Alternatives
This is a rather rich drink, so similar to my classic White Russian, I prefer using some alternatives to heavy cream. Here are a few I’ve experimented with:
– Half and Half: This is my preferred lighter substitute: it still creates swirls and has enough richness to feel satisfying.
– Whole Milk: This works but results in a slightly more diluted drink. You can make 2% work, although I would steer clear of 1% or skim.
– Full fat coconut milk (or oat milk): For a dairy-free White Russian, I enjoy coconut milk (canned, full fat) as it still creates the swirls. Oat milk can also be used, but it tends to be thinner.
Ways to Serve This Festive Cocktail
This Peppermint White Russian is perfect for serving as a holiday drink. Here are a few ways I like to present it:
Peppermint White Russian
This luscious Peppermint White Russian showcases vodka, Kahlua, and peppermint schnapps for a minty variation of the traditional cocktail! It’s merry and ideal for winter gatherings.
Author: Sonja Overhiser
Prep Time: 2 minutes
Cook Time: 0 minutes
Total Time: 2 minutes
Yield:

Mint Chocolate Cream Drink
This Grasshopper beverage recipe transforms mint and chocolate liqueurs into a rich dessert cocktail that is sure to impress everyone! Here are my professional tips for crafting this minty green after-dinner drink.
As a lifelong fan of mint chocolate chip ice cream, it’s no wonder I’m attracted to the Grasshopper drink! This light green classic cocktail originated in 1918, yet it remains a favorite today.
The blend of crème de menthe and crème de cacao creates this remarkably smooth, creamy beverage that resembles dessert more than a cocktail: which is precisely the aim! It stands out as one of my preferred sweet alcoholic beverages and is quite easy to prepare at home.
What Makes a Grasshopper Unique?
The Grasshopper cocktail is a post-meal drink featuring two liqueurs: crème de menthe and crème de cacao. Allegedly, it was created in New Orleans in 1918 by the proprietor of Tujague’s bar.
According to Tujague’s legend, Philip Guichet designed it for a cocktail contest in New York City, where it placed second. He later introduced it to his bar, and Tujague’s has continued to serve it ever since.
Key Ingredients
The Grasshopper gained such popularity that it was included in the International Bartender Association’s IBA official cocktails, which means it has an “official” classification. There’s also a variation of the Grasshopper that includes ice cream, resembling more of a milkshake. The classic Grasshopper cocktail consists of:
– Crème de menthe: The Grasshopper is the primary reason to purchase this liqueur, although you may occasionally use it in other cocktails like the Stinger Cocktail. It’s a vibrant green liqueur developed in the 1880s and contains no actual cream: it’s alcohol infused with peppermint. The flavor is intensely minty, akin to peppermint schnapps but more polished and balanced. You want the green version for a Grasshopper.
– Crème de cacao: This chocolate liqueur is slightly more adaptable: it boasts a smooth milk chocolate taste with hints of vanilla. Besides Grasshoppers, you can incorporate crème de cacao into Chocolate Martinis, Brandy Alexanders, and Mudslides.
– Heavy cream: Cream provides the silky texture of this cocktail. Similar to a White Russian, you can substitute half and half, whole milk, or even full-fat coconut milk or oat milk for a non-dairy alternative.
The Frozen Grasshopper Variation
If the term Grasshopper conjures images of a boozy milkshake, then you’re thinking of its variant known as the Frozen Grasshopper. The Frozen Grasshopper originated in Wisconsin and was frequently served at supper clubs there.
The Wisconsin drinking style is also responsible for classics like the Brandy Old Fashioned, Pink Squirrel, and Brandy Alexander: it’s all about enjoyable, sweet cocktails heavy on dairy!
To create a frozen version, use 2 scoops of vanilla ice cream in place of cream and blend until smooth. It tastes like a mint chocolate milkshake with a spirited twist!
Serving Recommendations and Presentation Tips
Present your Grasshopper in a chilled martini glass or coupe, adorned with shaved dark chocolate or a light sprinkle of cocoa powder. You can also rim the glass with chocolate syrup or create a swirl inside (similar to this Chocolate Martini).
This beverage is perfect as a dessert drink after a meal. It complements chocolate desserts such as flourless chocolate cake, brownies, or chocolate-covered strawberries beautifully. It’s also a festive green drink for St. Patrick’s Day thanks to its vivid hue (though there’s nothing Irish about it).
For a playful twist during the festive season, consider serving mini Grasshoppers (a half recipe) in cordial or host glasses as a dessert cocktail flight, alongside Spiked Hot Chocolate or Irish Coffee.
Storage and Pre-Making Tips
A Grasshopper cocktail tastes best when served immediately after shaking. The cream can separate if left too long, and the frozen version melts quickly.
To prepare this drink in batch, you can mix 2 to 3 cocktails at once (approximately 12-16 ounces of liquid) in a 28-ounce cocktail shaker. Ensure you don’t fill it more than two-thirds full.
The liqueurs themselves are stable on the shelf and will last for 2 to 3 years in your liquor cabinet. Keep them in a cool, dark environment shielded from direct sunlight.
Common Questions
Can I substitute white crème de menthe for green? It would have the same taste but would lose the stunning green color! The flavor will be identical, but you’d forfeit that iconic emerald look (you could add a drop of food coloring if desired).
What distinguishes a Grasshopper from a Mint Chocolate Martini? A classic Grasshopper incorporates cream and equal amounts of the two liqueurs, resulting in a decadent, dessert-like drink. Mint chocolate
Read More
Single-Pan Baked Pizza in the Oven
Store-bought: You can also prepare this recipe using 1 ½ pounds of pizza dough purchased from the store. Allow the dough to reach room temperature before shaping. Shorten the second resting period to roughly 15 minutes since commercial dough is generally already proofed.
Make-ahead: You can make the pizza dough and finish the initial proof only, then cover the entire sheet with plastic wrap and refrigerate for 24 hours (the second proof will take place in the refrigerator). Ensure to let it sit at room temperature for 30 minutes prior to baking.
Storage: Remaining sheet pan pizza can be kept in the refrigerator for up to 4 days.
Reheating: Warm slices in a covered skillet over medium heat for approximately 5 minutes. This technique crisps the bottom while heating the toppings. You may also reheat in an air fryer for a few minutes or in a 375°F oven for 8-10 minutes.
Read More
Joyous Seasonal Drink: Yuletide Punch Formula
This simple Christmas Punch recipe combines cranberry juice, pineapple, and ginger ale for a delightful drink that’s sure to impress a crowd. You can add rum for an adult version or keep it non-alcoholic: both options are undeniably tasty!
When it comes to signature beverages, offering a punch is genuinely the simplest way to elevate your gathering. So this holiday season, give this Christmas Punch a try! The flavor profile is fruity and scrumptious, enhanced by a fizz from ginger ale.
It’s fantastic on its own, so I prefer to serve it plain and let guests add rum to their glasses if they choose. This way no one feels excluded! Decorate with sliced citrus fruits, sprigs of rosemary, and cranberries, creating a festive focal point for any celebration!
Ingredient Overview
This Christmas Punch recipe is straightforward with minimal components, ideal for effortless holiday hosting! In terms of punch, I’ve discovered that it’s not merely a “throw anything together” scenario. After careful experimentation and adjustments, I found the ideal mix of juices, fizzy bubbles, and optional spirits. Here’s what you’ll require:
– Cranberry 100% juice blend: This juice blend can be found at most grocery stores, usually mixing grape, apple, and pear juice with cranberry juice. Be sure to choose “100% juice” or “no sugar added” on the label.
– Pineapple juice: Pineapple introduces the perfect tropical twist; it’s fantastic for punch recipes.
– Ginger ale: Ginger ale provides just the right carbonation! It’s sweeter compared to ginger beer, which is also suitable but offers a spicier ginger flavor.
– Rum: This transforms it into a Christmas rum punch! However, it’s equally delightful without, as a non-alcoholic option.
To Spike or Not to Spike?
You can certainly add alcohol straight to the Christmas punch! But if kids will be present, it’s considerate to let drinkers spike their drinks afterward. This allows for maximum flexibility: you can serve both an alcoholic and a non-alcoholic punch simultaneously!
– Add the alcohol to the punch bowl. If you’re serving all adults who desire an alcoholic punch, include it directly.
– Spike the drink afterward. A better method for crafting an alcoholic Christmas punch is to spike the drink after pouring it from the punch bowl. This way it caters to both kids and adults! The optimal ratio is 2 ounces of rum (¼ cup) to 8 ounces (1 cup) of punch.
– Serve it as a non-alcoholic punch. It’s just as flavorful, and mocktail recipes are currently popular.
Best Alcohol for Christmas Punch
Here are some of my preferred choices and how they alter the taste:
– Rum: Aged rum, or añejo rum, has hints of vanilla, coconut, almond, citrus, or caramel. White rum has a clean flavor with a signature fruity finish. Dark rum can deepen the color significantly while adding notes of cinnamon and spices.
– Bourbon: Bourbon is also perfect for a Christmas punch! It adds spicy undertones with traces of vanilla and caramel.
– Champagne or Prosecco: Alternatively, opt for a bubbly punch! Add champagne or Prosecco right before serving.
Beautifying Your Punch Bowl
The garnishes elevate this from “just a beverage” to a festive holiday display. The more, the merrier when it comes to making it visually appealing. My favorite garnish combinations include:
– Sliced citrus: orange, lemon, or lime
– Pineapple slices
– Whole spices: star anise, cinnamon sticks, or cloves
– Rosemary sprigs
– Fresh or frozen cranberries or raspberries
For added flair, freeze cranberries and small rosemary sprigs in ice cube trays filled with water, then toss a handful into the punch bowl. (Just be careful not to overdo it, as it may dilute the flavor.)
Storage and Make-Ahead Tips
This Christmas punch takes only a few minutes to prepare. However, if you wish to prepare some elements in advance, here’s what to do:
– Make ahead: The day prior, refrigerate all liquids. Slice the citrus and prep garnishes, keeping them refrigerated. About 30 minutes before guests arrive, combine the cranberry and pineapple juice in a punch bowl. Right before serving, add the ginger ale and garnishes (to keep the carbonation).
– Leftover punch: Pour into a pitcher or large jar with a secure lid. It will stay good in the refrigerator for 2 to 3 days, although the ginger ale may lose its fizz.
– Batch size: This recipe can be easily doubled or tripled for larger gatherings. One tip: add the ginger ale gradually to maintain fizz.
Serving Suggestions
This punch pairs well with any kind of holiday spread, especially since it can be either alcoholic or non-alcoholic.
– Brunch gatherings: Offer the non-alcoholic punch alongside a
Read More
Family-Friendly One-Pot Ravioli Soup Dish
**Family-Friendly One-Pot Ravioli Soup Recipe: A Heartwarming Treat**
When it’s time to whip up a meal that pleases the whole family, both ease and taste are essential. One-pot dishes have become a beloved choice in numerous homes due to their practicality and easy cleanup. Among these, the one-pot ravioli soup shines as a warm, filling meal that gathers everyone around the table. This recipe is not only straightforward to prepare but also brimming with flavors that delight both children and adults alike.
**Ingredients:**
– 1 tablespoon olive oil
– 1 medium onion, chopped
– 2 cloves garlic, minced
– 1 pound ground Italian sausage or ground beef
– 1 teaspoon dried Italian herbs
– 1/2 teaspoon red pepper flakes (optional, for a touch of heat)
– 1 can (14.5 oz) diced tomatoes
– 4 cups chicken or vegetable broth
– 1 package (20 oz) refrigerated cheese ravioli
– 2 cups fresh spinach or kale, chopped
– Salt and pepper to taste
– Grated Parmesan cheese, for serving
– Fresh basil or parsley, for garnish
**Instructions:**
1. **Sauté the Aromatics:** In a large pot or Dutch oven, warm the olive oil over medium heat. Add the chopped onion and sauté until translucent, approximately 3-4 minutes. Incorporate the minced garlic and continue to cook for another minute until aromatic.
2. **Brown the Meat:** Incorporate the ground Italian sausage or ground beef into the pot. Cook until browned, breaking it apart with a spoon as it cooks. If necessary, drain any extra fat.
3. **Season the Soup:** Mix in the dried Italian herbs and red pepper flakes, if using. Add the can of diced tomatoes, juice included, and the chicken or vegetable broth. Allow the mixture to come to a gentle boil.
4. **Cook the Ravioli:** Once the soup is boiling, mix in the cheese ravioli. Lower the heat to a simmer and cook as per package directions, typically around 5-7 minutes, or until the ravioli are soft.
5. **Add the Greens:** Stir in the chopped spinach or kale and let it wilt into the soup for about 2-3 minutes. Taste and fine-tune the seasoning with salt and pepper as required.
6. **Serve and Garnish:** Ladle the soup into bowls, topping with grated Parmesan cheese and fresh basil or parsley for a fresh finish. Serve hot and relish the comforting flavors with your family.
**Tips for an Ideal Ravioli Soup:**
– **Customization:** Feel free to adapt the soup by incorporating other vegetables like zucchini, carrots, or bell peppers for enhanced nutrition and color.
– **Cheese Options:** While cheese ravioli is traditional, you can experiment with various fillings such as spinach and ricotta or mushroom ravioli.
– **Make it Creamy:** For a richer version, blend in a splash of heavy cream or half-and-half just before serving.
This family-friendly one-pot ravioli soup is ideal for hectic weeknights or a cozy weekend meal. Its deep flavors and cozy warmth make it a favorite for all ages, ensuring that everyone leaves the table content. Savor the simplicity and tastiness of this charming dish with your dear ones.
Read More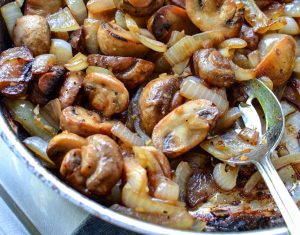
How to Sauté Perfect Mushrooms Quickly and Effortlessly
Storage Guidelines for Sautéed Mushrooms:
Once cooked, let the mushrooms cool entirely prior to storage. Store them in a sealed container in the refrigerator for up to four days. Freezing sautéed mushrooms is not advisable, as it may result in a watery and mushy consistency when thawed.
For reheating, the preferred technique is to use a skillet set to medium heat. Stir occasionally to ensure even heating. If the mushrooms seem dry, add a bit of olive oil to bring back moisture. If you are preparing the mushrooms a day ahead, consider slightly undercooking them; this will allow for ideal doneness when reheated just before serving.
Ingredient Replacements:
Should cremini mushrooms not be available, button mushrooms serve as a good substitute. For the best flavor, opt for fresh herbs instead of dried. Fresh parsley, basil, or chives can replace other herbs. If you choose to use dried herbs, commence with 1 ½ teaspoons of dried oregano to ensure a well-rounded flavor.
Read More
Tahini Hot Chocolate Recipe Packed with Protein
# Indulgent Protein-Packed Tahini Hot Chocolate
If you desire an indulgent, elevated hot chocolate made with nutritious ingredients, this recipe is for you! We’ve been presenting this frothy, tahini-blended, super dreamy hot chocolate, and even chocolate experts agree it’s worthy of appreciation.
Even though it’s naturally sweetened and mixed with water, it’s just the right amount of sweetness, profoundly chocolaty, and smooth on the palate. It also sneaks in healthy fats, fiber, protein, and a hint of cinnamon to aid in regulating blood sugar levels. Enjoy it plain, or enhance with your favorite whipped cream for the ultimate comforting indulgence.
## Protein-Packed Tahini Hot Chocolate Ingredients
This isn’t your typical hot chocolate! It’s incredibly creamy, decadent, and filled with wholesome ingredients. Here’s what you’ll require to prepare it:
– **Cocoa powder** – a generous scoop of cocoa powder guarantees this drink is exceptionally chocolaty, reminiscent of drinking chocolate!
– **Tahini** – tahini is one of our favorite components due to its nutritional advantages (hello vitamins, minerals, and healthy fats), plus it contributes a beautiful thickness, richness, and nutty essence to this hot chocolate.
– **Sweetener** – we adore a blend of maple syrup (or honey) + a medjool date, but you can easily replace it with nearly any sweetener. The date contributes a caramel-like taste and enhances the creaminess!
– **Sea salt** – just a small pinch is sufficient to elevate all the flavors present. Additionally, salt + tahini + maple = MAGIC!
– **Cinnamon** – delivers a touch more sweetness and helps balance blood sugar levels.
– **Collagen** – if you’re a fan of protein hot chocolate, definitely incorporate the collagen! Together with the tahini, it provides one mug of hot chocolate with a substantial 15 grams of protein. It also adds extra creaminess. If you’re vegan, your hot chocolate will still be delightful without it!
– **Coconut milk powder + water // your preferred milk** – when selecting your milk, the choices are plentiful. We favor a mix of coconut milk powder and hot water to create a richly creamy, dairy-free “milk,” but you can simply swap coconut milk for both, or use another milk you prefer (almond, oat, and cashew would all work wonderfully).
## How to Prepare Tahini Hot Chocolate
When it’s time for hot chocolate, blend all ingredients (including the hot water) in a heat-safe blender (one with a lid that has a vent to let steam escape). Blending results in extra frothiness and helps break down the date. Avoid using a sealed container, as hot liquids can build up pressure and potentially cause the container to burst.
What to do if you lack a heat-safe blender? Or a blender altogether? You might consider preparing this beverage in a saucepan on the stove and incorporating coconut sugar (or a liquid/granulated sweetener) instead of a date. Optionally, you can also use a handheld frother to achieve creaminess/frothiness!
We’re excited for you to experience this hot chocolate! It’s rich, creamy, chocolaty, perfectly sweet, frothy, dreamy, fiber- & protein-packed, nourishing, and incredibly delicious!
This is the ideal cozy drink for the holiday season, for replenishing after frolicking in the snow, or whenever you crave something indulgent yet nourishing. It pairs wonderfully with holiday cookies, especially anything chocolatey, like our Gluten-Free Chocolate Crinkle Cookies or Fudgy Vegan Brownie Cookies.
## More Cozy + Nourishing Drinks
If you try this recipe, share your thoughts! Leave a comment, rate it, and remember to tag a photo on Instagram. Cheers, friends!
### Recipe Summary
– **Prep Time:** 5 minutes
– **Total Time:** 5 minutes
– **Servings:** 1 (12-ounce serving)
– **Course:** Beverage
– **Cuisine:** Dairy-Free, Gluten-Free, Vegan (optional)
– **Freezer Friendly:** No
– **Does it keep?** 3 Days
### Ingredients
– 2 Tbsp cocoa powder
– 1 Tbsp tahini
– 1 pitted medjool date (or 2 tsp coconut sugar, or another sweetener of choice)
– 1/2 tsp maple syrup or honey (if not vegan)
– 1 pinch sea salt
– 1 pinch ground cinnamon
– 2 Tbsp collagen peptides (adds creaminess + protein // omit if vegan)
– 2 Tbsp coconut milk powder (or omit and replace hot water with warmed milk of choice)
– 1 ¼ cup very hot water (or milk of choice)
### Instructions
1. For optimal results, combine all ingredients in a high
Read More
Rapid Caramel Glaze Recipe for Amplifying Ham Taste
### Make Any Ham Holiday-Ready with This Simple and Fast Ham Glaze Recipe
Enhance your festive ham with this simple and fast ham glaze recipe that melds sweet and savory notes. Using everyday ingredients, this glaze can be made in merely a few minutes, making it ideal for those last-minute holiday tasks.
#### Flavor Profile
This glaze delivers a lovely sweet and tangy taste with hints of spice, resulting in a beautifully caramelized coat on your ham.
#### Skill Level
With only a handful of straightforward ingredients and easy steps, this recipe enables you to whip up an impressive ham that appears as if you devoted all day to preparing it. Just measure, combine, and brush the glaze onto your ham.
#### Technique
Timing is essential when applying the glaze. Brush it on during the last 20-30 minutes of cooking to prevent burning and to achieve a beautifully caramelized, glossy top.
#### Time Saver
You can make the Dijon ham glaze up to four days ahead. Keep it in the refrigerator and give it a stir before using. Having these ingredients on hand simplifies holiday preparation.
#### Serving Suggestions
Glazed ham goes wonderfully with:
– [Scalloped Potatoes](https://www.spendwithpennies.com/slow-cooker-cheesy-scalloped-potatoes/)
– [Roasted Carrots](https://www.spendwithpennies.com/honey-roasted-carrots/)
– [Roasted Asparagus](https://www.spendwithpennies.com/easy-oven-roasted-asparagus/)
### Ingredient Notes
– **Brown Sugar**: This ingredient caramelizes to form a sticky outer layer. Alternatives include honey, maple syrup, melted apricot jam, or apple jelly.
– **Juice**: Orange or pineapple juice boosts flavor and makes the glaze easy to brush. Apple juice also works as a suitable alternative.
– **Mustard**: Dijon mustard adds taste, enhanced by a hint of clove or ginger. Any type of Dijon or grainy mustard is effective.
### When to Glaze the Ham
To yield the best outcomes, glaze the ham when it hits an internal temperature of 115 to 120°F, about 20-30 minutes prior to being fully cooked. This timing helps prevent the sugar in the glaze from burning.
### Ham Glaze Success Secrets
– **Score the Ham**: Scoring the ham permits the glaze to permeate the meat, improving flavor. Spiral-cut hams do not need scoring.
– **Remove the Rind**: If your ham has a tough rind, remove it for a tender outcome.
– **Brush at the Right Time**: Apply the glaze when the ham reaches the right temperature to avoid burning.
– **Broiling**: For a gleaming, caramelized crust, broil the ham for a few minutes post-glazing.
### Storage and Leftovers
Keep any remaining glaze in a sealed container in the refrigerator for up to four days. Stir before reusing. Note that this glaze does not freeze well.
### Holiday Ham Helpers
This quick ham glaze is a fantastic method to make your holiday ham shine. Relish the praise from your guests as they enjoy the delightful flavors!
Did you like this homemade Ham Glaze? Leave us a rating and comment below!
Read More